• Allgemein

    Thoughts on the Tableau Conference Keynote

    My third Tableau anniversary is soon coming up. Three years of working with Tableau almost daily has brought me a lot of joy and has immensely increased my visualization and data analysis skills. But as with any long-term relationship, it also comes with its frustrations. I’ve recently been reflecting a lot on where Tableau as a tool is going and how my personal relationship with it will evolve. That’s why I’ve been very interested to hear the opening keynote speech at this year’s Tableau Conference. Well, #data22 is done and I have some thoughts…

    Read about the new features and innovations introduced in the Tableau Conference keynote 2022 here

    Tableau’s place in the enterprise infrastructure:
    Tableau’s acquisition by Salesforce and its integration into the Salesforce environment remains an important topic. I understand the vision of having all enterprise analytics needs combined in a single environment. Slack integration is along the same lines. I see why those topics are being heavily pushed as they are also a necessary counterpart to what Microsoft is doing. Personally, however, I remain utterly uninterested in any of that, and the main reason is that none of my customers use Salesforce or Slack. I realize that both tools are big players in the US which is also Tableau’s biggest market. But for the first time, it feels as though we as European customers are at a disadvantage since so much energy is spend on something we will not benefit profit from.

    Up in the cloud:
    The push towards the cloud makes complete sense to me. It is a clear trend with many tools and companies making the move to the cloud. However, I hope Tableau will keep its on-premise possibility. In my experience from working with customers, the ability to work 100% on premise this is still a huge selling point and distinguishes Tableau from many competitors.

    Data Stories:
    The first innovation presented in the keynote was the new automated data storytelling feature. I’ve been waiting for this ever since Tableau acquired a company specialized on this. Smart Analytics features are a very hot topic that all the big analytics providers are pushing right now. My first impression is – I’m intrigued. I can see my clients using this in their business dashboards. However, it will all depend on how well it actually works. I’m a big fan of Explain Data as well but the truth is that it often doesn’t work as well as one would hope. A smaller concern I have is that it will probably only be available in English which makes for some very awkward, not at all natural-sounding sentences if your data is not in English. In any way, I’m excited to dig into this more once it is available.

    Model Builder:
    Data Science for everybody is another idea Tableau has been pushing for a while – an idea I am totally on board with and am excited about in theory. However, we’ve had similar-sounding announcements in the past that ended up being only available to Salesforce users (or as part of ridiculously expensive add-ons). That’s why I’m holding back my excitement about this until I have more details about how it will actually be executed.

    New features in the “Devs on stage” section of the speech:
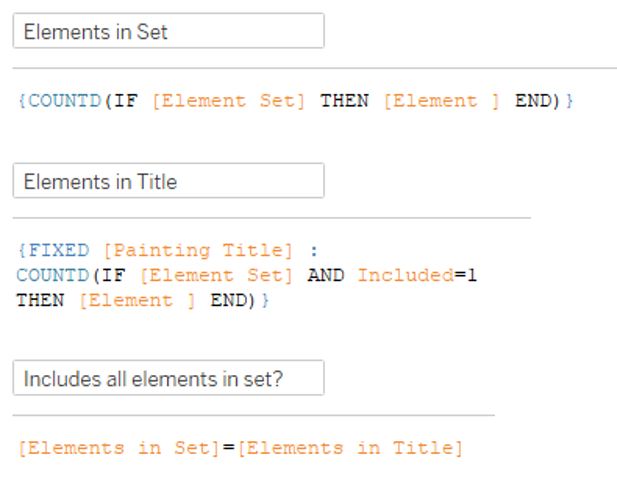
    “Devs on Stage” is always one of the highlights of Tableau conference and this year it was integrated as part of the keynote speech. The new features presented in this section were: new data modeling capabilities with shared dimensions (or “pasta salad” as I like to call it), new connectivity to web data and Python/R code, some new features for Tableau Prep, improvements for Ask Data, a new data orientation pane and dynamically rendered images.

    How do I feel about these new features? I guess the data and connectivity features will be useful in some specific cases. The improvements for Prep are probably much needed. Personally, I am not convinced that Tableau Prep is a viable data prep option on an enterprise level. The data orientation pane could be useful and I’m excited to see it in action. The rest of the new features are also… fine, I guess? Overall, I’m not mad about these new features, but I’m also not blown-away. I feel like Tableau Desktop (or authoring if you want to call it that) features got the short end of the stick. Where are the new tools that make life easier for me as an author and that will save me time? Where are some new UX features that will make the experience better for dashboard users (without authors jumping through hoops and implementing a hundred hacks)?

    – CONCLUSION –
    Tableau is making some important steps towards bringing advanced analytics capabilities to everyone and improving Tableau’s enterprise readiness. It remains to be seen whether these will only be useful for a certain customer base or if everyone will be able to benefit from these improvements. I feel a bit disappointed with the lack of improvement in the daily life of Tableau authors. I remain convinced that Tableau has the best user community of any BI tool out there. But I start to think that maybe it has become too good. The #datafam is so full of talent and creativity that they are able to solve any dashboard challenge and create the most amazing visualizations. Maybe because of that Tableau is starting to forget the need for software improvements that would render some of the trickery unnecessary.


  • Other vizzes

    Behind the viz: Game of the Year

    It’s been a long time since I’ve last posted anything on here. In fact, it’s been a long time since I’ve published a viz. I had to take a little break from vizzing. I just couldn’t find the energy to sit down and create anything. I’ve started several different projects but quickly gave up on them. But I tried to tell myself that it’s okay, that one of these days I’ll be blessed by the muse and get my creative juices flowing again. 

    Thankfully, I did come up with an idea for March’s #IronQuest challenge. So here it is – my contribution to the theme ‚Games‘. I finally created a viz inspired by one of my all time data viz heroes – Giorgia Lupi. And I finally got to use the new map layers in Tableau. I’ll tell you all about it in this blog.

    Click on the image to see the interactive version or download the workbook.

    Topic & Data Collection

    The theme for this month’s #IronQuest was ‚Games‘. For some reason, my immediate thought was Mario Kart – don’t ask me why. I actually started to look for data but nothing specific came to mind. But then I remembered the board games we used to play at home when I was younger. I remembered checking out the newest games in the toy catalog to see whether there were any cool new games I wanted to put on my Christmas wish list. And one major factor I remember was always which games won the most recent ‚Spiel des Jahres‘ (‚Game of the Year‘) award. This German board game award is super famous here and a pretty big deal. I found a list of all past winners on Wikipedia as a starting point and added some additional information about the games (game type, number of players,…) by browsing their wiki pages. Here’s the dataset I ended up with.

    Design & Preparation

    Next, I had to come up with a design for my viz. I wanted my design to reflect the overall topic of games. Basically, you should be able to get what the topic was simply by looking at the design. One thing I’d like to do to get some inspiration is a simple google image search – just type in ‚Board Game‘ and see what will come up! I quickly realized I needed my viz to resemble the game board itself! So each game would be represented by one field along the path on the game board. The rest of the data would be implemented using other shapes – Giorgia Lupi style.

    A simple mockup of a game board consisting of circles that create a path.
    A game board mock-up I created in Powerpoint.

    I started by creating a quick game board mock-up in Powerpoint, consisting of 42 circles (one for each game I wanted to depict) which form a bendy path. I loaded that into Tableau as a background image and used annotations to figure out the x and y coordinates of each individual circle. 

    With the coordinates out of the way, I went back to Powerpoint and began creating the shapes I wanted to use to encode the information in my viz. I first created the bubbles that I used for each game and that ultimately formed the path on the game board. I chose 6 different colors – one for each of the different board game types I had in my dataset. I added a radial gradient and some shadows for some texture and depth. 

    Bubble objects created in Powerpoint.

    Next, I included the other items and shapes I wanted to use to encode the other information: 1 to 3 triangles for the recommended minimum age, 1 to 3 bars for the game length and a circle for each possible player. And finally, a little heart for each game I personally have played before. I saved each set of objects separately as an image and moved it to the custom shapes folder in the Tableau repository.

    All the custom shapes I saved to later use in Tableau.
    Template for the final representation of a board game in the viz.

    Creating the viz

    All that was left was bringing it all together in Tableau. The new map layers in Tableau make this actually pretty easy. 

    1. Normalize the x and y coordinates by dividing them through the total length or width, respectively.
    2. Convert the coordinates into a geometric object with the MAKEPOINT() function.
    3. Bring in the geometric object as a map layer with the game ID on ‚Detail‘.
    4.  Use mark type ‚Shape‘ and put one of the other dimensions on shape (Number of Players, e.g.). Select the corresponding custom shapes.
    5. Repeat steps 1-4 until all elements are in the viz.
    And we’re done!
  • Other vizzes

    Behind the viz: Biggest boybands of all time

    A few days ago I published a new viz that I called The Biggest Boybands of all Time. This one has been flying around as an idea in my head for quite some time. But when I had a few days off after Christmas, I finally had time to sit down and actually create it. In this post, I’ll talk a bit more about how this viz came about.

    Idea & Data Collection

    This viz first started when I stumbled upon The Pudding’s awesome Internet Boy Band Database. This is a collection of boybands with No. 1 hits on the Billboard Hot 100, as well as more information about their members (such as age, physical traits, clothing style, etc.). This dataset was so much fun, however, it included a lot of qualitative data and not many numbers to do cool stuff with. But it got me googling and I soon wanted to find out what the most successful boybands of all time are. It’s actually surprisingly hard to find any decent data on that. Apparently, international record sales are not easily available. In the end, I settled for the numbers given in this Top 10 list by German music magazine Musikexpress. I then used good old Wikipedia to gather more information about the boybands on that Top 10 list. Overall, all of the information that is in the viz comes down to this (plus the names of the boyband members and the albums):

    Sketching & Data Preparation

    That’s where the real data prep fun only began, though! 

    For this viz, I started with some sketching (which I rarely do, but it was vital in this case)! As you can see, this first sketch is actually not that different from how the viz turned out in the end. I started with the top part and imagined the members (abstracted to be little blocks) standing on a kind of podium (which scales with the record sales). And then from that, I just thought of different ways to incorporate the other information I had gathered.

    Okay, I had an idea of where I wanted to go – but how to get there? Obviously, this whole construct consists of different viz types. So putting it all together in Tableau would either require a crazy amount of worksheets – or I would have to go down the polygon route. But that would require some more calculations and data prep.

    A raw sketch of the boybands data viz.

    I first divided the final object into individual polygons:

    • 1 small rectangle for each member of the boyband
    • 1 larger rectangle for the record sales
    • 1 very flat rectangle representing the timeline
    • 1 triangle as the marker on the timeline
    • 1 rectangle representing the bar for years active
    • 1 rectangle to fill up the rest of the bar
    • 1 square for each album

    You’ll now have to create a row of data for each polygon edge, specifying its position on the x and y axes. That’s how in the end that 10-row-dataset from above snowballed into more than 800 rows of data. There was lots of calculating but with a bit of patience, some more sketching and the help of Excel I figured it out. It truely felt like being back in geometry class at times.

    Creating the viz

    The cool thing about doing it all with polygons is that your viz comes together just like that, without you really having to do much additional work at all. You just set the mark type to ‚Polygon‘, pull all the things that will create the individual polygons onto the Details shelf and specify the path (i.e. the order in which the different edges of the polygon will be drawn). And voila – your viz is basically done!

    My initial idea was to keep it very simple, very minimalistic and keep it completely black and white (I guess I was still inspired by the recent #IronQuest challenge). I think it looks pretty cool as well, but I wasn’t 100% convinced. I felt like the simple colors did not really match the topic at hand. Boybands called for some more vibrant colors. For me, boybands equal 90s and 90s equal neon colors. So why not go full out neon?? I browsed Pinterest – my go-to source of inspiration for color schemes and landed on this cool color scheme on Imgur.

    Almost done! For the finishing touch, I wanted to create this neon-sign glowy effect. My polygons were not enough for that – I needed lines! Luckily, you can create almost the same viz by simply changing the mark type to ‚Line‘. The only catch is that you’ll need one datapoint more for each polygon: For example, if you want to create a square with a line you’ll need 5 data points. That 5th data point will be the one that brings you back to where you started drawing the square and thus close it off.

    So I duplicated my dataset, added the additional points and brought it back to Tableau. Then I gave my polygons some opacity and layered the lines on top of the polygons – and we’re done!

    TLDR – From sketch to first draft to final result
  • Allgemein

    My 2021 data viz resolutions

    After looking back at the year that was in my last two posts, it’s now time to think about what lies ahead. So here are my new year’s resolutions for 2021:

    • Quality over quantity – 2020 was all about putting as much content out there as possible. This year, I want to push myself to put the best possible content out there even if it means not making as many vizzes as last year.
    • Creating my own content – Most of the vizzes I created in 2020 were initiated by one of the many great community initiatives like MakeoverMonday. That also means that most of the time I did not really chose the topic myself. So, this year, I’ll try to create more content of my own accord. 
    • Data storytelling – Many of the vizzes I made in 2020 were pretty simple. Most often they were straight to the point with a single chart. This year, I want to improve my data storytelling. I want to focus more on longform vizzes, dashboarding and vizzes containing multiple charts. 
    • Collaboration – I would love to work on some vizzes together with someone from the dataviz community. So, if you’re reading this and this sounds like something you could imagine doing – please get in touch with me!
  • #MakeoverMonday

    A year of MakeoverMonday

    Welcome to a new year, dear reader! 2020 is finally gone. Time for one last look back before we put it on the ash heap of history where it belongs. Last week, I already reflected on all the vizzes I created in 2020. A huge part of those vizzes came from MakeoverMonday. So in this post, I’ll specifically talk about my MakeoverMonday experience. 

    By the end of 2019, I had learned all the Tableau basics and passed the Tableau Desktop Certified Associate Exam. So what next? I already knew of MakeoverMonday and had used some of the older datasets to build my Tableau skills. But for 2020 I decided it was time to become actively involved. So when the new year arrived, I set myself a new goal: Complete all #MakeoverMonday challenges in 2020! 

    Now that 2020 is over I can proudly report that I did it (well, almost… I’m still missing Week 47 but I’m just going to ignore that). So here it is – at a glance – a year’s worth of MakeoverMonday vizzes:

    An overview of 25 different data visualizations.

    As you would expect, not every one of those vizzes is a hit. But there are actually very few that I don’t like at all and many that I still like quite a bit.

    My favorite vizzes

    Here are some of my personal favorites:

    Child Marriage

    The nested squares to show parts of a whole are still one of my favorite new viz types I’ve done this year. Even though they might not be 100% best practice, I think they look pretty. I’ve used them in several other vizzes since and I’m sure they’ll come up every now in then in my future vizzes as well. This viz was also the first MakeoverMonday viz I blogged about here on this blog.

    Waves of music formats

    You might have noticed from the overview of vizzes above that I rarely use dark backgrounds and bright colors. So this one is kind of different than what I usually create. I like the vibrant blue and the minimalistic style of that viz.

    Representation of women in politics

    This one looks like a book cover. More specifically, like the MakeoverMonday book. I swear that wasn’t intentional, but it must have been in the back of my mind somewhere. I remember it took me quite a while to make it look neat but I think it was worth the effort. I still like the design and the use of blank space to show where representation is lacking.

    Sugar consumption in Britain

    This one holds a special place in my heart. This is way back from Week 3. I think this was the first time I submitted a viz to viz review. Charlie and Eva gave some great advice and I went back and revised my viz. This then became the first viz that was picked as a favorite at the end of the week.

    Lessons learned

    Looking back at my year of MakeoverMonday vizzes – what are some of my key takeways?

    • Consistency is key: My main motivation for starting this project was to consistently create vizzes. MakeoverMonday gives you the easiest opportunity to do exactly that. You don’t have to spend time thinking about a topic and gathering the data. You can just go ahead and create. 
    • Not every dataset is gonna be equally appealing to you and that’s okay: With 52 different topics in the year, it’s quite obvious that some weeks will be harder than others. Sometimes the topic might not be as interesting to you or be something you know nothing about (Looking at you, Week 35 Cricket dataset). I was very aware of that fact when I started and promised myself to not let that deter me from creating a viz anyway. Honestly, it’s been good practice for my work as well, because let’s be real – your clients data will not always be the most exciting data you’ve ever seen or you might be having a hard time coming up with an idea in the beginning. Working through all the MakeoverMonday topics helped me prepare for that situation and assured me that I can in fact make a viz out of every topic thrown at me.
    • If you’re short on time – make that part of the challenge: In the beginning, I blocked a few hours on Sunday afternoon to create my viz, often with more time needed on Monday to finish it. But soon I found that I couldn’t keep up that time commitment. And the point is – you really don’t need to spend that much time on it. If you’re worried about the amount of time you’ll have to invest, I can only recommend trying time-boxing, i.e. limiting the time spent on creating a viz to maybe 1-2 hours. It’s actually a very useful exercise and something that’ll easily happen to you in real life anyway.
    • When in doubt – bar charts: Okay, it’s obviously not as simple as that. But when you look at all the vizzes I created you’ll see that there are many variations of bar charts in there. You’ll find the same thing if you go through the weekly favorites on the MakeoverMonday blog. Many of the MakeoverMonday datasets are pretty simple and that’s why simple bar charts are often the easiest and most effective way to present the data. I often feel like I need to invent a new chart type or do something super outlandish. But perfecting the bar chart can be a great goal, too!
    • Try something new with every viz: I tried to adhere to that rule as much as I could and incorporate something new, something I had never done before into each viz I created. It could be anything from a new chart type that I’ve never done before, or a Tableau feature I haven’t used before, to something as simple as a specific color I’ve always wanted to use.
    What’s next?

    After a year of MakeoverMondays, I still think it is one of the best datafam initiatives out there. It’s so much fun and the feedback you can get from it is so valuable. I don’t necessarily plan on doing all 52 MakeoverMondays again this year, but I’ll try my best to do as many as I can. There’s still a lot of things to learn and improve, so let’s keep practicing!

  • Allgemein

    2020 – My year in vizzes

    2020 has been my first full year in the data viz community. I first started using Tableau at my new job in September 2019. I spent a few months deep-diving into the tool and by the end of 2019, I decided to become more active in the community. I wanted to keep practicing and improving my skills and consistently produce content. The initial goal I set myself for 2020 was to participate in every #MakeoverMonday in 2020 – a goal I (almost) reached (still missing 3 at this point, I think) and which I’ll write a separate blog post about. But overall, I ended up publishing more than 70 vizzes to my Tableau Public profile:

    • 50 MakeoverMonday vizzes
    • 8 WorkoutWednesday vizzes
    • 1 IronViz feeder submission
    • 5 IronQuest submissions
    • 13 vizzes just for fun

    Let’s take a look back at some of my personal favorites…

    My two Vizzes of the Day

    We’re starting with something I have very conflicting feelings about. So… I got two #VOTD! That’s obviously an incredible honor and on paper probably my biggest success. #VOTD is a big source of inspiration for me and it features some incredible work. So getting it twice and this early in my data viz journey is mindblowing to me.

    But I guess that’s where my conflicting feelings start. See, I got the first one for my Week 5 #MakeoverMonday viz and the second one in March for my first ever #IronQuest submission. Which is crazy. But the point is I don’t think those vizzes are in any way exceptional. I don’t dislike them. I think they’re fine. But compared to other VOTD they are pretty boring. And I think even within my own portfolio they don’t stand out to me. I’ve done better things since. At least I hope I’ve improved since. So, yeah, I’m just not quite sure what to make of this…

    Click on the image to see the interactive version.
    The viz I would frame and hang on my wall

    This is the one viz in my portfolio I might consider data art. I love Van Gogh and felt inspired by his iconic use of color. I like how minimalistic and abstract this viz is and that it doesn’t even look like a data viz at first.

    The viz is best enjoyed while listening to this:

    My first multi-part viz series

    I always wanted to combine data viz with my love for Broadway and musicals. So I spent a few evenings collecting data on one of my favorite musicals – Hamilton and chanelled the results into a three-part viz series.

    My most underrated viz

    My ‚Hot 100 again‘ viz barely got any attention on Twitter and has a whopping 18 views on Tableau  Public (most of which I probably generated myself). However, I still like it. The topic is interesting – why do some hits reenter the charts years after they have first been successful? The colors are fun and I tried that kinda storypoint interactivity for the first time. So maybe give this one a try if you’re reading this? 

    My proudest moment

    My proudest data viz moment this year came when I published this viz. Somehow it found its way to the man himself Steve Wexler who messaged me on Twitter and called it a rare good use case for pie charts. 

    Goodbye 2020

    Even though 2020 sucked in many ways, it was a good year on my own data viz journey. I feel so much more confident in my data viz abilities. Even though I still feel like I have a lot to learn or still struggle to find my voice at times, this look back at the year that was showed me that I did make progress. I’m so grateful to be a part of the #datafam and am excited to see what we’ll all come up with next year!

  • #MakeoverMonday

    #MakeoverMonday Week 50 – Bob Ross

    Another week, another MakeoverMonday and this week we’re looking at the paintings of Bob Ross. What a fun little data set! Here’s what I came up with:

    For some reason, I felt like doing a mobile layout. To get some design inspiration I scouted Pexels for nature and landscape photos or paintings. This beautiful abstract photo of Bondi Beach by Max Ravier caught my eye. I knew that I had found my background. I only added some blur to make it less distracting and ended up with this beautiful sunset gradient.

    The first viz is pretty simple. It’s actually very similar to the original image we gave a Makeover to this week. The only thing I changed was limiting it to the Top 20 instead of showing all possible elements. 

    For the second page, I wanted users to be able to find a painting by chosing the elements they want to appear in it. I grouped the elements (for example, putting all types of trees into one tree category) and created the grid layout. I then created a set and a set action that will filter the list depending on the elements chosen in the top part of the visualization. But here’s the catch – the filter based on the set will have an OR logic. For example, if you select ‚beach‘ and ‚boat‘ you’ll get all paintings that include either beach elements or a boat. But I wanted the results to be limited to only those paintings that include both elements. 

    Achieving the AND logic in this case requires a few LOD calculations:

    1) Calculate the number of elements that are currently in the set

    2) For each painting, calculate the number of elements that are both included in the picture and also included in the set

    3) Create a boolean field that checks whether the number of elements in the set is the same as the elements in the painting.

    Use this boolean as a filter and allow only TRUE values. Now only those paintings will be listed that include ALL of the elements chosen.

    And that’s it for this week. Check out the interactive version here.

  • Other vizzes

    Are Best Practices always best?

    I recently published a viz in which I looked at some characteristics of world leaders in the last 70 years. I looked at four categories that each had two groups – Gender (Male/Female), Age Group (above/below 60), whether the leader was elected or not, and whether the country was a democracy or not. Here’s the viz I created:

    Here’s a question I feel is worth discussing:

    Should I have followed best practices for this viz?

    Let’s start by looking at some of the things I like about the viz as it is:

    • It piques my interest because it’s a little bit different than most vizzes I see.
    • I personally find it visually pleasing. I think it’s because I like the symmetry of the squares.
    • I think it manages to drive the basic message: I can tell how the ratios have changed over time.

    But what are some of the draw-backs I can identify?

    • We as humans are super bad at estimating areas. It’s the same problem I mentioned for my Child Marriage MakeoverMonday.
    • The numbers for each pair of squares always add up to 100%. That fact, however, is not obvious at first glance in this viz.
    • A simpler way to represent this data – and the one I would consider the best practice approach – would have been with a stacked bar chart. This would also make it easier to quickly see the change over time.

    So… taking the more experimental road with the dual squares or sticking to best practice and using a stacked bar chart? What’s the better approach in this case? I’m happy with the dual square chart in this context but in a business context, I would probably stick to the stacked bars. But I created a comparison below and you can judge for yourself which one you like better…

  • #MakeoverMonday

    #MakeoverMonday Week 43 – Apparel exports

    Week 43 of #MakeoverMonday gave us a dataset about the consequences of the COVID pandemic on US apparel suppliers. 

    I tried timeboxing again and limited myself to an hour. Here’s my result:

    I myself are honestly suprised by this result: First time I’ve ever used a Comet chart and I rarely do dark backgrounds. I think the comet chart works well in this case where we want to compare values for two years.

    But, in one respect, this viz is kind of a cop-out. I really struggeled with orientation – which field should I put on which axis? Usually, I follow two rules rather dilligently:

    • Time goes left to right – so on a horizontal axis
    • Categories go top to bottom – so vertical axis

    In this viz, I really struggeled finding a compromise because we had two different time dimensions (years and months) and for some reason I couldn’t find a combination I liked. So due to my time-constraint I coped out in the end and simply aggregated the months to avoid the problem.

    In hindsight, I should have included the months and could have ended up with something like this:

  • #MakeoverMonday

    #MakeoverMonday Week 41 – Data Survey Results

    Charlie gave us a pretty simple and straight-forward dataset for this week’s MakeoverMonday. It comes from DataIQ’s survey on Data Assets and Data Cultures. Basically, it’s about how many respondents of their survey came from which industry sector. 

    Here’s the simple bar chart I created with that dataset:

    Here are some of the thoughts I had while creating this:

    • I struggled to find any interesting insight in this data. I thought about grouping the sectors to find something more interesting – but I couldn’t really find a way of grouping that made sense to me. But without further grouping, the percentages become really small. You now end up with information such as ‚2% of recipients work in logistics‘ – which just doesn’t feel all that useful to me. However, the ‚Other‘ gorup was already pretty large with 11% – so putting some of the smaller percentages into that category wasn’t a viable option for me either. In the end, I just accepted the data as it is. Maybe I’m just not the right person to look at that data. Maybe it’s quite insightful for someone who works with surveys more often. I decided to not focus too much on the content and concentrate a bit more on the design aspect of it.
    • A bar chart might seem a bit boring. But I think in this case it really is the best way to present the data. But I’d be happy to be proven wrong if someone comes up with something amazing. All the other vizzes I’ve seen so far have also been bar charts, though.
    • I used a vibrant blue color (#11139a) that I had in my color inspirations for a while and finally got a chance to use.
    • I tried something I haven’t done before with the positioning of the labels on top of the bars. I did it by creating the bars and the labels on separate worksheets and then floating them on top of each other on the dashboard. There might be a better way to do this which I might explore if I ever have time. I would also try to find a way to increase the spacing between the individual bars to give them a bit more breathing room.
    • At first, I put the explainer text below the title (above the bar chart). But then I realized that there is so much whitespace in the bar chart that I’m wasting. So I placed the text there instead. I included the lines to still create a connection between the title and the text. My hope is that this guides reades to start with the title and then go to the text before actually looking at the chart.